
Cookie Dough Bites How to Make Homemade Bites 5 Min Step-by-Step
Cookie Dough Bites How to Make Homemade Bites 5 Min Step-by-Step
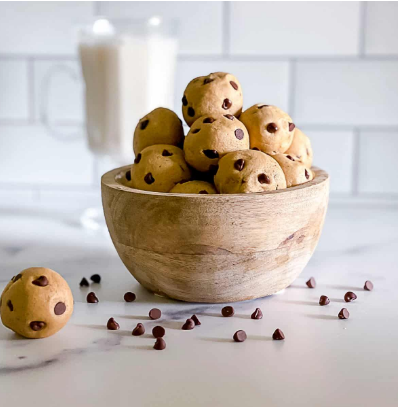
Cookie Dough Bites Imagine walking into your kitchen and being greeted by the sweet aroma of freshly made cookie dough. It’s the kind of feeling that instantly takes you back to childhood, to those moments of indulging in the raw dough before the cookies even made it to the oven. But what if you could enjoy that same feeling, minus the wait or worry about baking? That’s where homemade cookie dough bites come in. These little morsels of joy let you savor the goodness of raw cookie dough in bite-sized portions, and best of all, they’re totally safe to eat! Ready to dive in? Let’s explore how to make these simple yet irresistible treats, step by step.
What Are Cookie Dough Bites?
Cookie dough bites are small, round portions of raw cookie dough, typically made without eggs and with heat-treated flour to ensure safety. Unlike traditional cookie dough, these bites are designed to be eaten without baking, offering the same delicious taste of raw dough but in a safe, convenient form.
Why are they so popular? Cookie dough bites have become a beloved treat for anyone who’s ever sneaked a bite of raw cookie dough from the bowl. Their versatility means you can enjoy them on their own or coat them with chocolate for an extra indulgence. Perfect for snack time, parties, or a sweet after-dinner treat, these bites are a favorite for kids and adults alike.
Essential Ingredients for Perfect Cookie Dough Bites
To make the perfect homemade cookie dough bites, you’ll need a few key ingredients that work together to create the delicious dough we all love. Let’s break them down:
| Ingredient | Purpose |
|---|---|
| Butter | Adds richness and creaminess to the dough. |
| Brown Sugar | Provides sweetness and moisture, creating a chewy texture. |
| Vanilla Extract | Enhances the flavor, giving the dough its signature taste. |
| Heat-Treated Flour | Ensures the dough is safe to eat raw. (More on this below.) |
| Milk | Binds the dough together and adds to the texture. |
| Chocolate Chips | Adds that perfect chocolatey finish. |
What’s So Special About Heat-Treated Flour?
One ingredient that sets homemade cookie dough bites apart from regular cookie dough is heat-treated flour. Raw flour can sometimes contain bacteria, which is why it’s important to treat it before using it in edible dough. You can easily heat-treat flour at home by spreading it on a baking sheet and baking it at 350°F (175°C) for about 5-10 minutes. Let it cool before using it in your dough for a safe and delicious treat!
Step-by-Step Guide to Making Cookie Dough Bites
Ready to get started? Let’s break down the process of making these delicious cookie dough bites into easy-to-follow steps.
Preparing the Cookie Dough
-
Cream the Butter and Sugar: In a large bowl, beat together softened butter and brown sugar until the mixture becomes light and fluffy. This process adds air to the dough, making it soft and smooth.
-
Add Vanilla and Milk: Once the butter and sugar are well mixed, add vanilla extract and milk. Stir everything together until fully combined.
-
Incorporate the Dry Ingredients: Slowly mix in your heat-treated flour and a pinch of salt. Stir gently until the dough comes together. The dough should be thick but soft enough to scoop and shape.
-
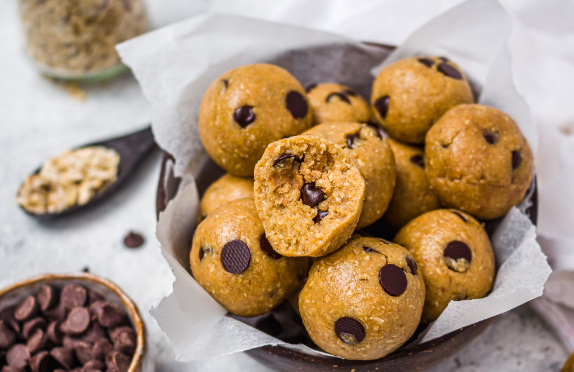
Fold in the Chocolate Chips: Finally, fold in chocolate chips (or your choice of add-ins like mini M&Ms, nuts, or dried fruit) until evenly distributed throughout the dough.
Rolling and Chilling
-
Scoop the Dough: Using a small cookie scoop or your hands, roll the dough into balls about 1 inch in diameter. Don’t worry about making them perfect — part of the charm is their homemade, rustic look.
-
Chill the Bites: Place the dough balls onto a parchment-lined baking sheet and refrigerate them for at least 30 minutes. Chilling helps the dough firm up, making it easier to handle and preventing the bites from becoming too soft.
Coating Your Cookie Dough Bites
While the dough bites are chilling, you have an optional step that can take these treats to the next level: dipping them in melted chocolate. Here’s how:
-
Melt the Chocolate: Use a microwave or double boiler to melt your chocolate. You can use dark, milk, or white chocolate depending on your preference.
-
Dip the Bites: Once the dough bites have firmed up, dip each one halfway into the melted chocolate. Place them back onto the parchment paper to let the chocolate set.
-
Optional Coatings: If you’re feeling creative, roll your cookie dough bites in colorful sprinkles, crushed nuts, or even mini marshmallows before chilling them to add more texture and flavor.
Tips and Tricks for the Best Cookie Dough Bites
To make sure your homemade cookie dough bites turn out just right, here are a few pro tips to keep in mind:
-
Don’t Skip the Chilling Step: Chilling the dough is essential. If you skip this step, the dough may become too soft to roll and shape properly. It also helps the flavors develop, making the bites even more delicious.
-
Use Room Temperature Butter: Softened butter incorporates better into the dough, making the texture smoother. Don’t try to use cold butter, as it will make the dough too stiff.
-
Choose Quality Chocolate: The chocolate is a key element in these bites. Pick a chocolate you love to eat by itself, since it will be a prominent flavor in each bite.
-
Add-Ins Galore: If you’re craving something different, mix in a handful of your favorite snacks! Think crushed pretzels, peanut butter chips, or even toffee bits for a delightful twist.
Variations and Flavor Add-ins
Homemade cookie dough bites are incredibly versatile. Once you’ve mastered the basic recipe, you can easily customize your dough to match your preferences or seasonal flavors.
Peanut Butter Cookie Dough Bites
For a nutty, rich flavor, add a dollop of creamy peanut butter into the dough. This gives the bites a satisfying, savory-sweet twist.
S’mores Cookie Dough Bites
Love the taste of s’mores? Add crushed graham crackers and mini marshmallows to your dough for a fun, campfire-inspired treat that’s sure to please.
Brownie Cookie Dough Bites
If you’re more of a brownie person, incorporate a couple of tablespoons of cocoa powder into the dough for a richer, chocolatey flavor that’s almost brownie-like.
Storing and Serving Cookie Dough Bites
Making a big batch of cookie dough bites? Here’s how you can store them and enjoy them later.
Storing Your Cookie Dough Bites
-
In the Fridge: Store your cookie dough bites in an airtight container in the refrigerator for up to a week. Keep them chilled for the best texture and taste.
-
In the Freezer: Want to make a big batch for later? Freeze the dough balls on a baking sheet, then transfer them to a sealed container or freezer bag. They’ll last for up to 3 months.
Serving Your Cookie Dough Bites
-
Chilled for Best Texture: These bites are best enjoyed cold. Pop them out of the fridge before serving for a refreshing, sweet treat.
-
Perfect for Parties: Cookie dough bites are a fantastic addition to any party spread. Arrange them on a platter, and watch them disappear in no time.
FAQ: All Your Cookie Dough Bite Questions Answered
Q1: Can I make cookie dough bites without chocolate?
Absolutely! You can skip the chocolate and still have a delicious treat. Try adding other mix-ins, like nuts, sprinkles, or dried fruits, to keep them interesting.
Q2: Can I eat cookie dough bites without chilling them?
While you can technically eat them immediately, chilling the dough helps them firm up and hold their shape better. Plus, it enhances the flavor.
Q3: Are cookie dough bites safe to eat?
Yes! As long as you use heat-treated flour and omit raw eggs, these cookie dough bites are safe to eat raw.
Q4: Can I make cookie dough bites gluten-free?
Absolutely! Swap the regular flour for a gluten-free flour blend to make these bites suitable for those with gluten sensitivities.
Conclusion: Enjoying Your Homemade Cookie Dough Bites
There’s no denying it—cookie dough bites are a fun, easy, and irresistibly sweet treat that everyone can enjoy. Whether you’re making them for a special occasion, a quick snack, or just because you crave something indulgent, these bites are the perfect choice. So, gather your ingredients, follow these simple steps, and enjoy the best homemade cookie dough bites you’ve ever tasted. Trust us, you’ll want to make a second batch!
Call to Action: Ready to make your own cookie dough bites? Head to your kitchen and get baking—er, mixing—and share your creations with us on social media! Don’t forget to leave a comment below and let us know how your homemade cookie dough bites turned out!